When you are involved in writing on the internet, you want to have quality content, and you want to be as efficient as possible when you create it. I am going to give you an example in this post for one of the best business writing tools – creating great images and graphics is entirely possible with this WordPress plugin.
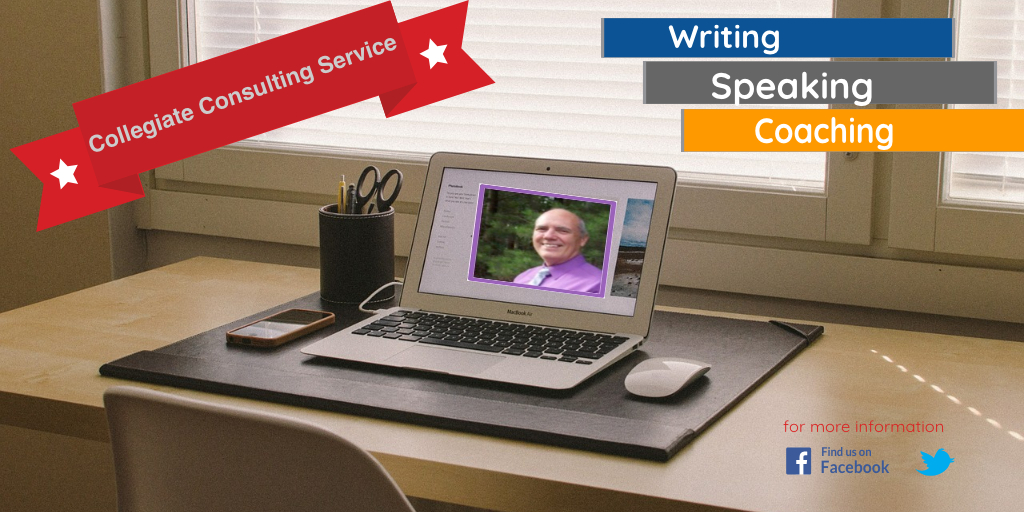
The image above, highlighting my writing, speaking and coaching business was created right in the WordPress document.
I liked it very much.
Business-writing tools are very important for any business. First of all, you are likely to have a website, and you will have to have content on your website.
Then, you don’t want it to be just any content. Rather, you will want to have useful content. In order for the useful content to have a hearing, though, it will need to be appealing.
One of the things that adds value to any webpage, blog, or article is an image. Having several relevant images is even better.
Aside from a website or a blog, you are likely also to produce other types of written content. You may write an ebook (or a print book, for that matter). Images add value to that medium.
In this article, we will look at three aspects of image creation for our websites. First we will see what some of the options are. Second, we will see a new option that has become available as I write this. Third, we will discuss the likability factor of these types of image creation.
The Old Standards – Previous Options
You can get a really good program – one that is an old standard. The problem with it at present is that for some of who are beginners, it may “cost us an arm and a leg!”
Fortunately, there is a similar open-source option that has been available for a while too. Many think it is almost as good as the more expensive option.
We bring these up because they are really good programs. They have even become know as the old standards in the image-creation field.
That first one is known as Photoshop (Notice that Adobe Photoshop has registered trademarks for both terms–Adobe and Photoshop). It is an excellent program. One of the things that add such value to it is the ability to work with images in layers.
Actually, many of us think that the price for such a great program is very reasonable, but for the person starting out, it may seem a little pricy.
The open-source program is very similar to Photoshop, but it is free. It is called, GIMP. GIMP stands for GNU Image Manipulation Program. It, like Photoshop, allows you work with layers.
Both programs have features that let you filter the images and adjust the color and transparency of each layered image, as well as many advanced features.
Are there any other options?
What Else Can We Do? – A New Option
We have discussed these two good programs. However, if you are using a website builder, you will likely have a box called a content editor where you put in your words, and of course you can input your pictures too.
WordPress is one such website builder with which many of us are familiar. In fact, I am writing this post using that platform.
Using both GIMP and Photoshop, you have to go outside of the content editor and work on your photos or other images. You can crop the photos or resize them. Sometimes you can flip the horizontal or vertical direction of the photo, as well as doing many other things. Once you have your image edited to your satisfaction, you can save it to a file.
Then you can go to your content editor and input the image. Usually, the editor will give you the option to import the image from the file where you stored it.
That is all good, but wouldn’t if be great if you could work with editing the image right in the content box instead of having to go outside the website builder?
Well, there is good news.
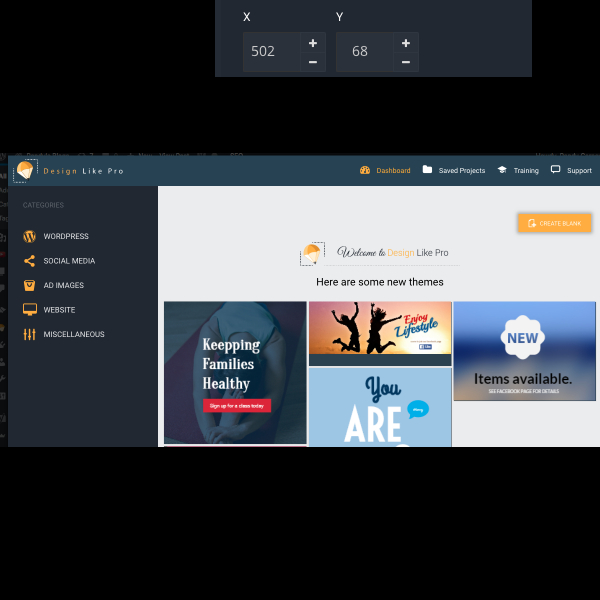
There is a newer option. It is called DesignLike Pro. You can start with your images right inside the content editor in WordPress. Then you can click on a button to edit right there.
I am trying it right now.
I just took a screen shot on my MacBook Pro.
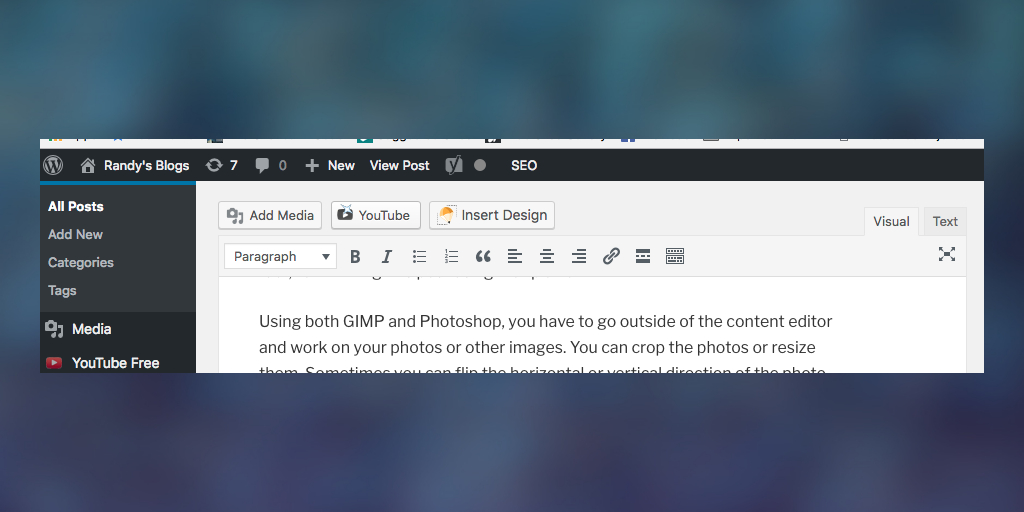
Those of you who use WordPress will recognize the content editor. Notice that at the very top, there is an option to “Insert Design.” Since I have already installed the Plugin, it took me right to a screen where I could begin working on images.
Notice the blue background. That started out as an image similar to a business card or a larger image like a website header. Since it allows me to work with layers, I just kept clicking on the text and pictures and deleting those items.
Then I added an image. I was able to go to my desktop and get the screen shot. Now that I have already done that, it shows up in my image gallery, and it will be even easier to insert if I want to use it again.
Let me try some more examples:
I am going to “Insert Design.”
I clicked on the image to enjoy Lifestyle, Then I saved and inserted it here.

Now if I want to edit this image, I just click on it, and the orange pencil icon appears. I can click on that right here in Word Press. Then I can start deleting or adding to layers.
Let’s delete some.
Notice that it deleted the word, “Lifestyle.”

Then I deleted the layers that had the Facebook icon, and the words, “Come to join our facebook page.”
You get the idea. I can do all of this within the word press editor.
Will I like It? – Advantages of the New Option
I guess I can only answer for myself, and I have only had it for two days, but, “Yes! I do like it.”
It is not free, but it is much less than photoshop, and I really like being able to work with the layers (and it has some other editing features too) without having to go outside of what I am already doing.
Conclusion
So, yes, we have three great options. They all have their advantages. I do like the DesignLike Pro.
If you would like more writing tips, you may go to DrRandyCarney.com where you could download a free gift of “Time Management for Writers.”
I wonder if any of you have used this program.
What do you think about the idea of having something like this as a plugin for WordPress?
